Tagged: dragon dagger toy
Mighty Morphin Power Rangers’ Green Ranger inspired nail art
As a kid who grew up primarily in the ’90s, I remember when the Japanese invasion came into North America with the likes of Sailor Moon, and Mighty Morphin Power Rangers. I only found out later that the shows were dubbed and the Japanese versions were completely different. Nonetheless, I am still a fan of those English dubs and remakes, and today marks the first Power Rangers film to come out in 10 years.
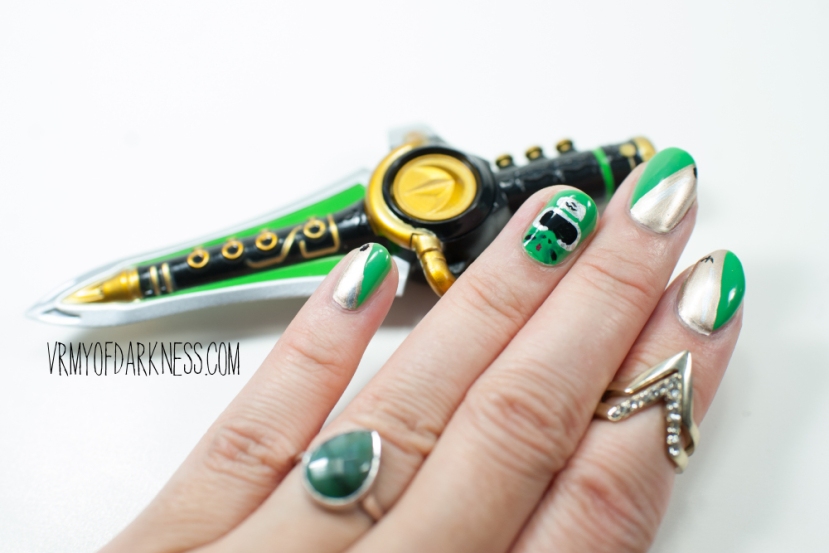
So to celebrate, I pay homage to my favourite Power Ranger of all time: the Green Ranger.

My toy collection is a strange one: I collect Sailor Moon figures and wands, Breaking Bad paraphernalia, StarCraft merch, and the strangest nook in my collection? My Green Ranger figures, Dragonzord, various Dragon Daggers. But only the Green Ranger. I remember when Power Rangers was released on Netflix again and I didn’t feel like it was as good as when I had remembered as a kid, but when Twitch streamed all Power Rangers, all the time – there was that special magic being shared with about 68,000 other people on Twitch spamming the chat channel:
- blblblblblblblblb
- GREEN GUY
- GREEN DUDE
- TOMMY NO
- WHY IS HE WORKING OUT IN THE ARCADE
Small, little things that might have missed me when I was a kid, now being shared with people of all-ages on the Internet. Absolutely incredible.
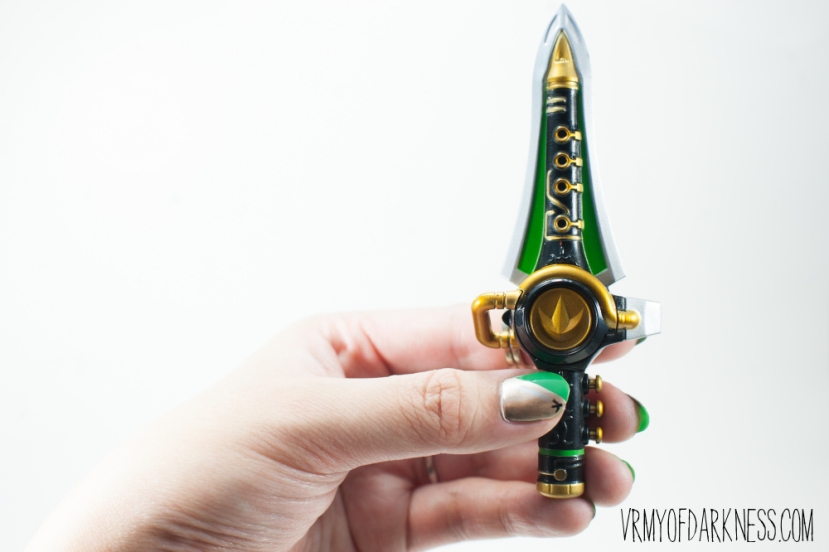
This small scale Dragon Dagger is perfect for nail photos. I may or may not have got it for this sole purpose. It comes with a sticker book but it didn’t really have to. The sticker book is VERY ’90s, so it runs in the theme.

In either case, if you feel like attempting this insanity and don’t mind being seen in public with Green Ranger nails, here’s how you get this hawt look (I started saying this when I made my first ‘technailogy’ post and now I can’t stop):
- Use your favourite base coat and apply one layer to your nails. Let dry.
- Apply thin layers of green polish to your nails. You may need 2-3. Let dry.
- Pick your highlight nail for the helmet. I picked my ring nail as it was cut shorter.
- Using a fine nail art brush, paint the black visor on the helmet nail.
- With the same brush, use the smallest amount for the helmet dragon’s eyes, nostrils. Clean brush.
- Using a fine nail art brush, paint a silver mouth piece. Clean brush.
- Using a fine nail art brush, paint some darker green fine lines to help shape the helmet dragon. Clean brush.
- Using a fine nail art brush, paint white outline around the black visor. Clean brush.
- Using a fine nail art brush, paint some tiny teeth along the black visor’s outline. Clean brush.
- Using a fine nail art brush, paint a tiny red dot in the centre. There’s some gold around it, but I left it out. Clean brush.
- Using a fine nail art brush, paint the lip shapes – note that you will need to wipe a lot of excess as a little goes a long way. Clean brush.
- Use a gold polish and paint diagonally. I didn’t really know what I was doing here so feel free to go ham.
- Using a fine nail art brush, paint the Green Ranger’s crest’s icons randomly on your nail. I did a bad job so you should really do better than what I did.
- Top off with your favourite top coat and you’re done!
Was it worth it? Of course it was.

Polishes and materials used:
- Nails Inc. – Hyde Park
- Julep – Payton
- OPI – Jade is the New Black
- OPI – Black Onyx
- OPI – Alpine Snow
- Essie – As Gold as it Gets
- Essie – No Place Like Chrome
- Joe Fresh – Cherry
- Seche Vite top coat
- Fine nail art brush from Daiso